Saturday, 24 February 2018

Filming the Music Video - Day 2


After my editing session I was now able to have more organisation in my filming of the music video as I knew exactly what I needed to film and where I needed to be. I managed to stay on schedule and knew which locations I needed to go in order to film, this saved a lot of time which allowed for additional shots.
Since I stayed on schedule I then had time to film in another location in order to film another scene. This location was not the most ideal as some of the mise-en-scene was not entirely fitting for the scene, this was however the most accessible area and the location was appropriate enough for the music video.


Editing the Music Video - Day 1

In my first editing session I uploaded my footage to Premiere Pro. I deleted the footage that was unnecessary and organised the rest. During editing I got to see what footage came out well and what might need re-filming. I also got to see how much time was filled with the footage I already had which gave me a good idea on how much more filming I needed to do.

This was a successful first filming session as it allowed me to get a good idea of what I have already filmed and what I need to film. Next time I edit I aim to have more focus on the more complex editing such as effects, transitions and a precise edit to the beat of the song.

Friday, 16 February 2018

Editing the Music Video - Day 2

In my second editing session I was able to do more advanced editing as I now had enough required footage. I first added all the footage I needed for the video and deleted the unnecessary clips in order to have more organisation. I unlinked all the videos from their audios so that I could delete audio of the clips without deleting the clips. I then took the footage I had on the timeline and looked more carefully at it in order to edit it to the beat of the song. 

After the editing of the clips I used the three-way colour corrector and applied it to my clips. This effect allowed me to change the saturation and colour of my clips in order to change the mood of the clips. I then found that some of the clips of mine were darker than I had hoped and so I applied the brightness and contrast to some clips which thankfully worked in improving the quality of the clips.

Friday, 26 January 2018

Filming the Music Video - Day 1


In my first day of filming I managed to film about a minute of my music video. I didn't forget any props and everyone involved arrived on time, so I was able to stay on schedule and reshoot many shots multiple times. I need to have a more specific idea of what I want to film the next time in order to get more of the film done.

Thursday, 21 December 2017

Production Meeting 4

In this final meeting I had finished all of my planning documents and now had to go over these plans with the person I was going to get to act in my video I discussed which days would be most suitable to shoot the video, to best fit their schedule and I went over the songs lyrics and the basic idea I had for the video.

I also thought about my digipak and magazine advert. I figured that it would be a good idea to take some pictures during the process of filming so that the person starring in my video could appear on the digipak with the same look that appears in the video, linking the digipak to my music video.


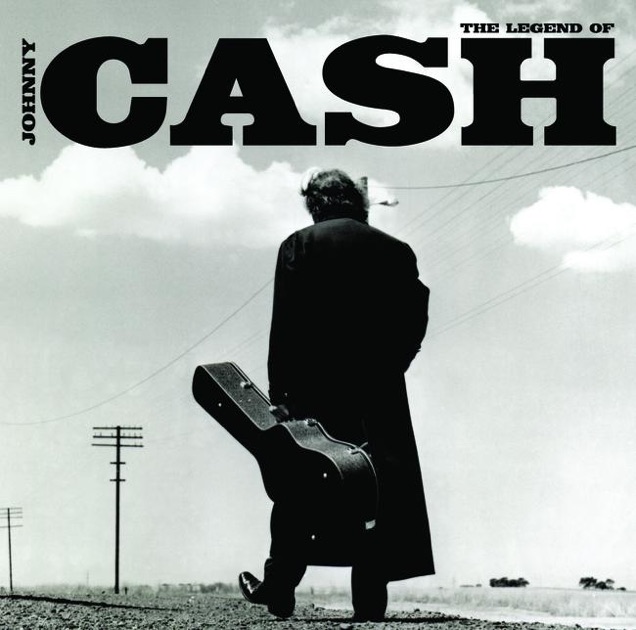
I liked the cover of 'The Legend of Johnny Cash,' and felt that it does well at reflecting the tone of my album cover as well. The shot of the lone man suits the theme of 'feeling isolated' that my song was going for.

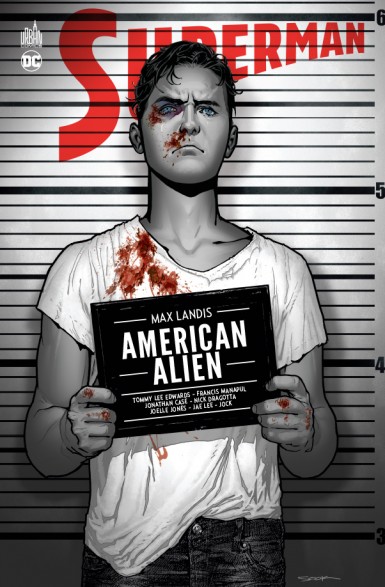
When thinking about my magazine advert I came across some inspiration from the cover of Max Landis' 'Superman: American Alien'. I thought that by having a 'mugshot' of the artist it would be a unique way of having the artist and all the information (on the black board) which needed to be shown. Having it as a mugshot helps it to stand out from conventional magazine adverts and appeals to a 'rebellious youth' audience. I may also emulate the black and white effect with the remaining colour in the eyes as I feel it adds depth to the image and makes the image distinctive.